| I talk a lot about my cello life before I met Martha. I was a complete mess in many ways, but especially regarding my cello technique. For example, when I would play in an extended position to accommodate a G# on the D-string, every other finger in my hand position would be out of tune. That didn't work well ever, really, but especially when I had to play fast passages. Once Martha started working with me, she introduced a new kind of extension, one that kept my non-extended fingers in a place where they could play actual notes! It was a long retraining process, but I finally incorporated her "open" position into my technique and my intonation improved 1000%! |
I am sure that if I hadn't undergone this transformation, I would not be a cellist today. The frustration would have taken hold, and I would have quit playing the cello...
I'm so thankful for open position!
I'm so thankful for open position!
The Easier Way
| Instead of stretching WHATEVER finger, it works a lot better to stretch only your first finger. That's a strong finger and stretching it makes much more sense than extending your poor little pinky out on its own. It has got enough problems just being strong enough to press the cello strings while curved! The advantage of this hand shape (instead of stretching out your pinky) is that all your other fingers are on actual notes as well! Don't worry, you can reach a high 4th finger with this shape too. Read on! |
Open Position
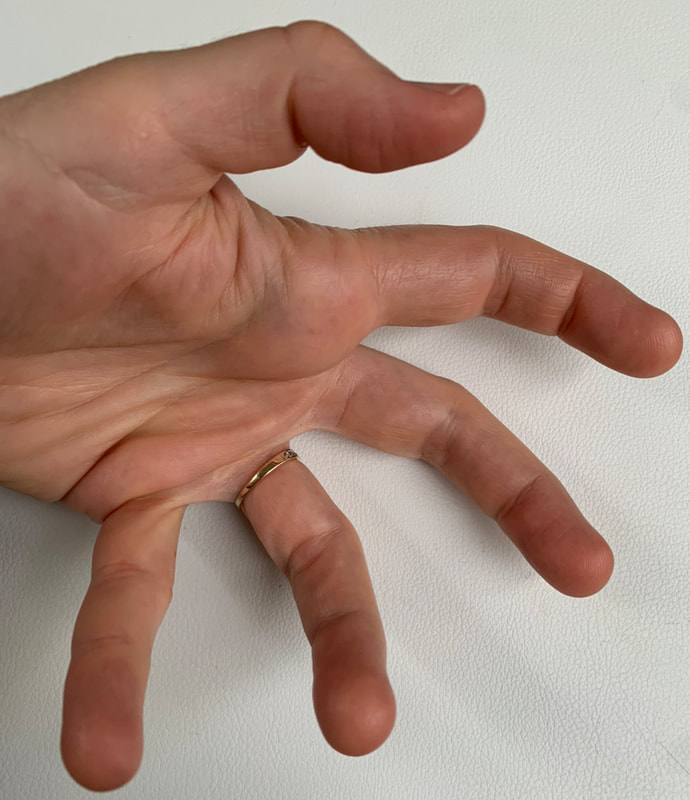
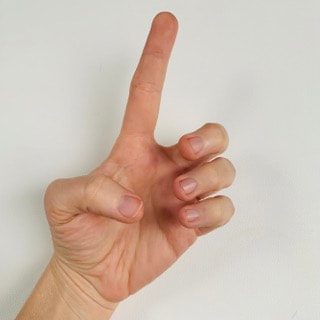
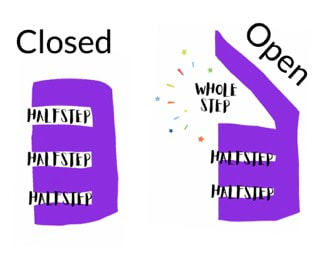
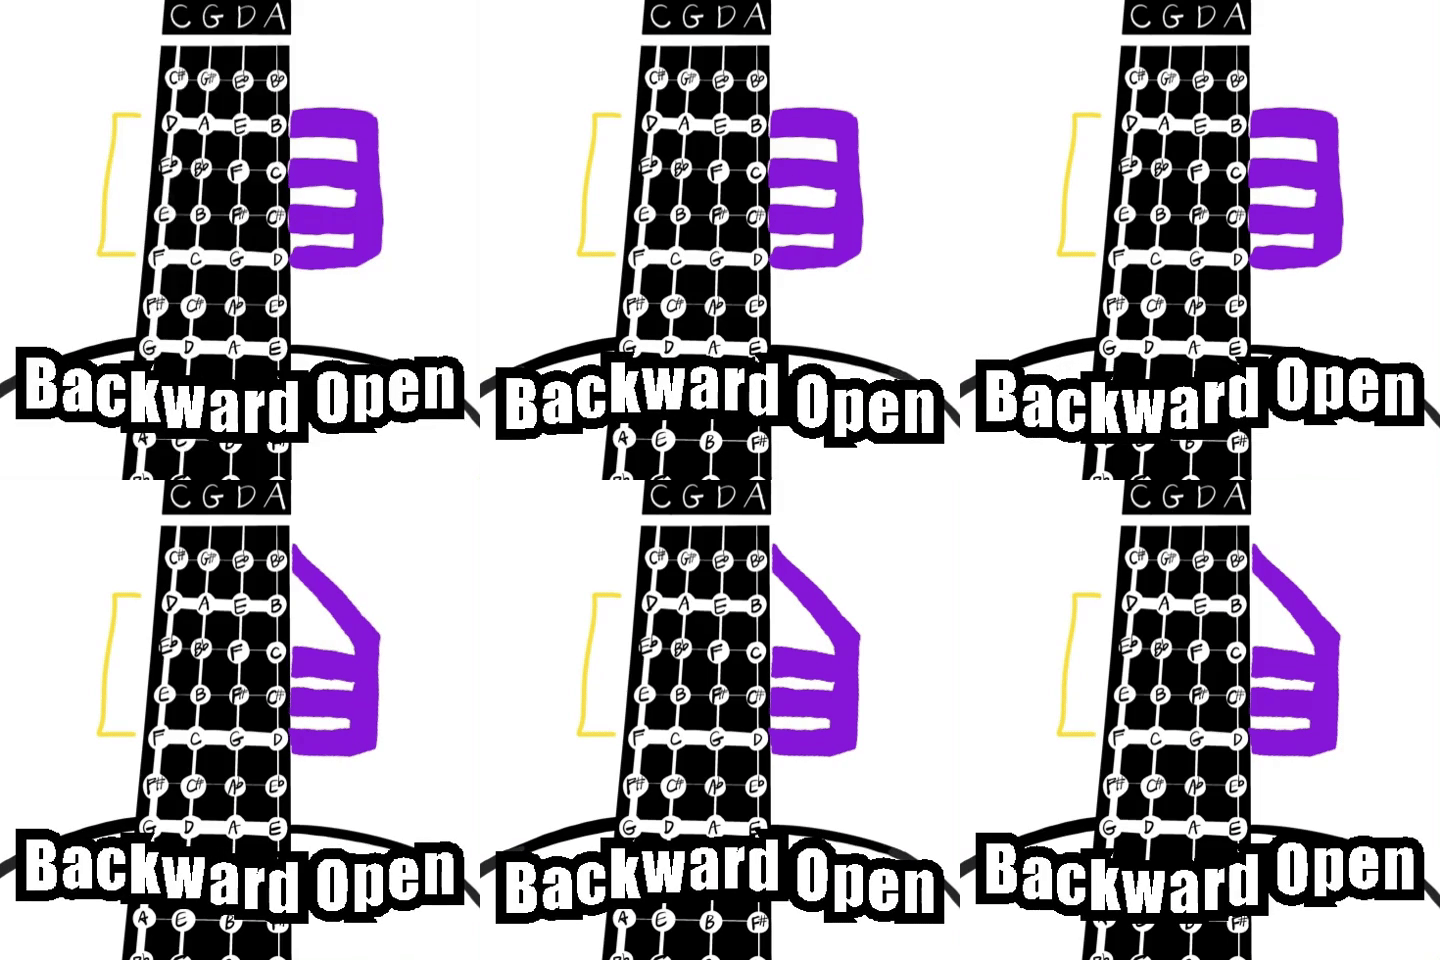
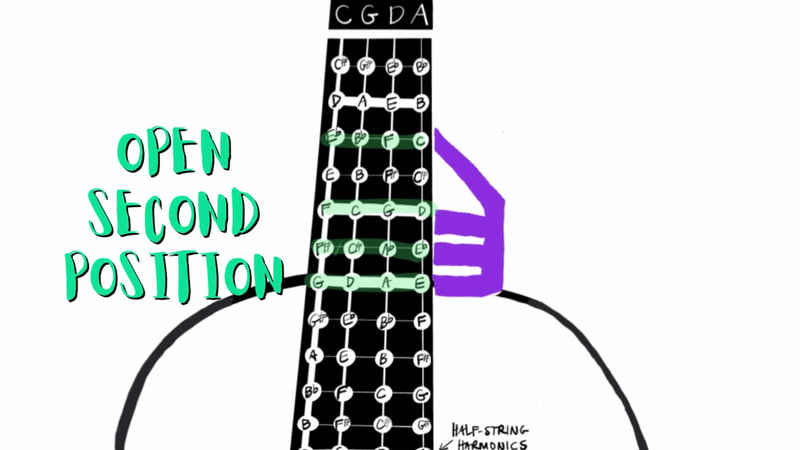
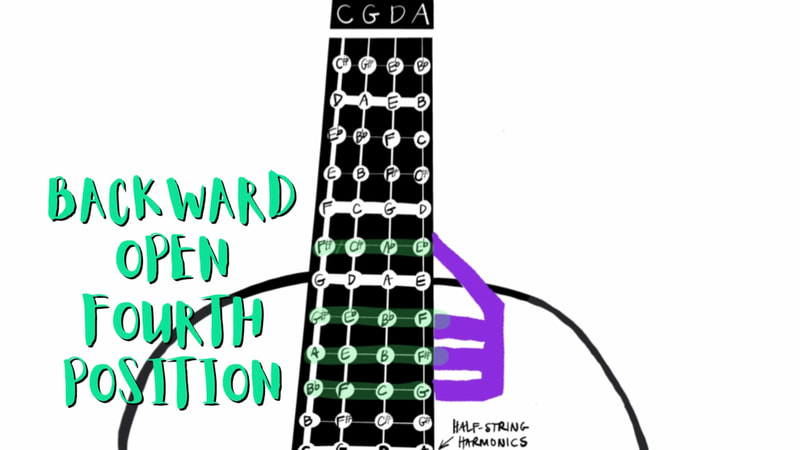
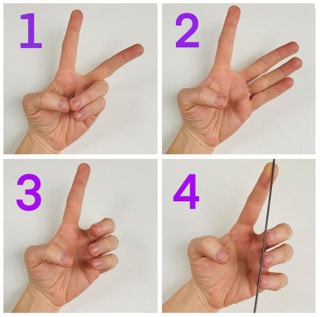
| I call this extended or stretched hand shape OPEN POSITION. Martha said it makes it sound less difficult and taxing. And it IS! It's a smarter and more ergonomic way to play. In this OPEN position, your fingers maintain the same spacing that they have in your normal (closed) position. So you can count on them to be in the same place they normally are when you reach back for a low 1st finger. Reaching back with your first finger without moving is what I call Backward Open. |
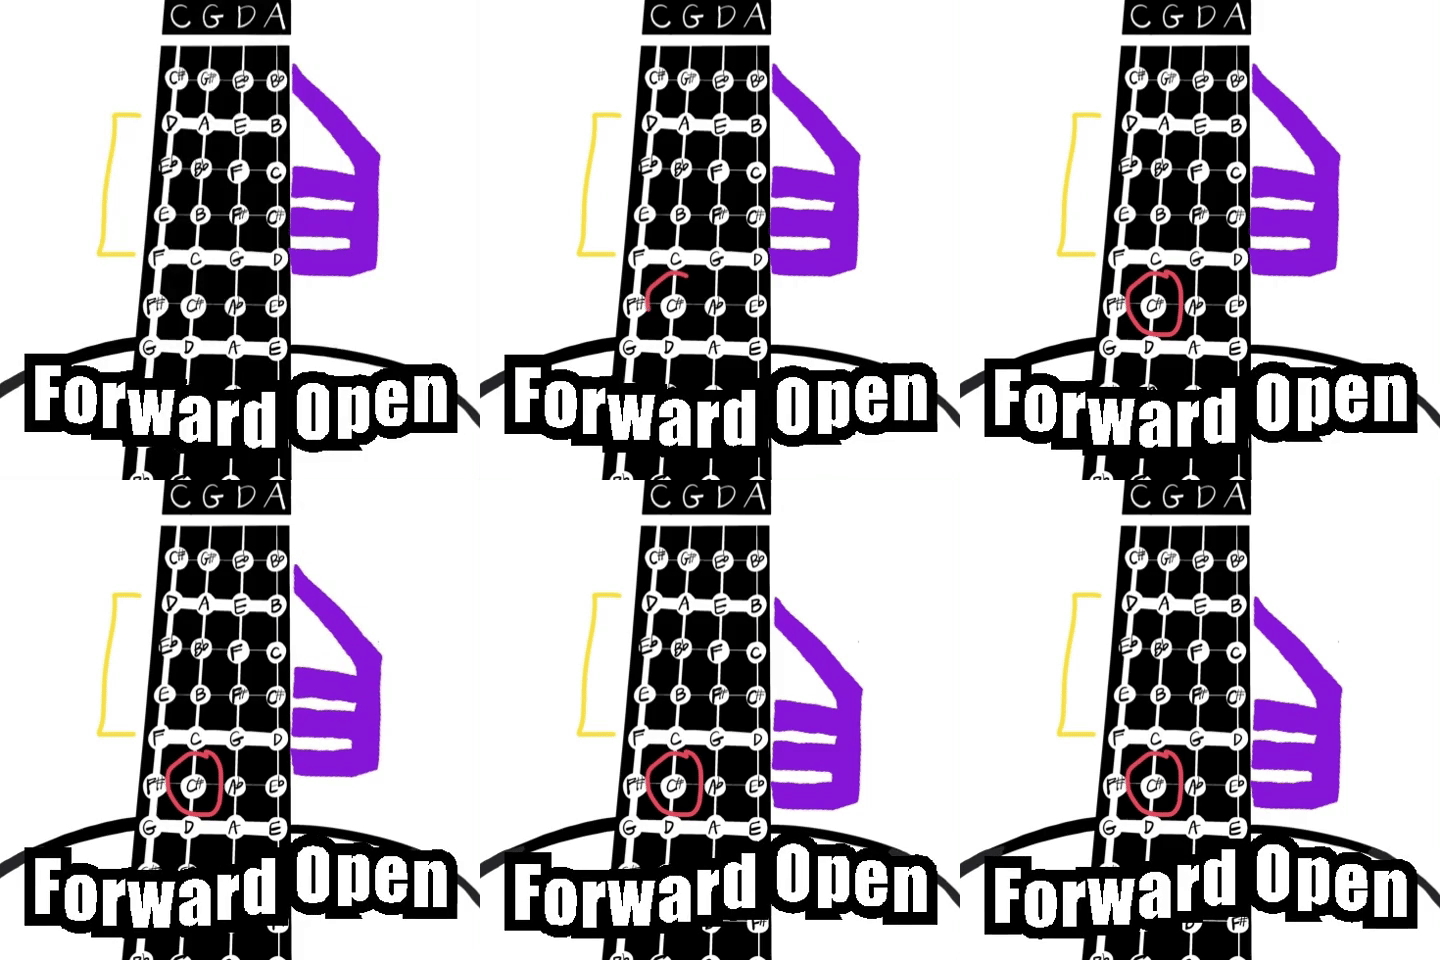
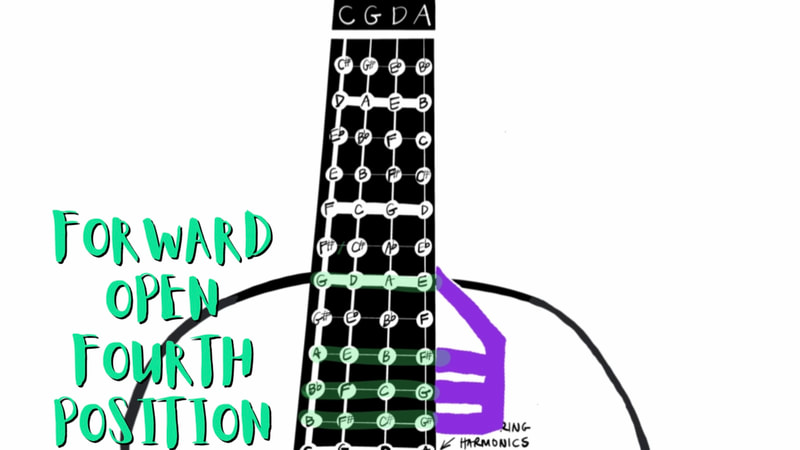
To play a high fourth finger, you will simply move your hand forward in a halfstep shift and then point back first finger so that it reaches the normal place for your first finger. Now your third finger is on the note your regular (closed) fourth finger plays, 2nd finger is on the 3rd finger spot, etc. You can play all the other notes in that hand position and they will be in tune! This is what I like to call Forward Open.
Cowboy Legs
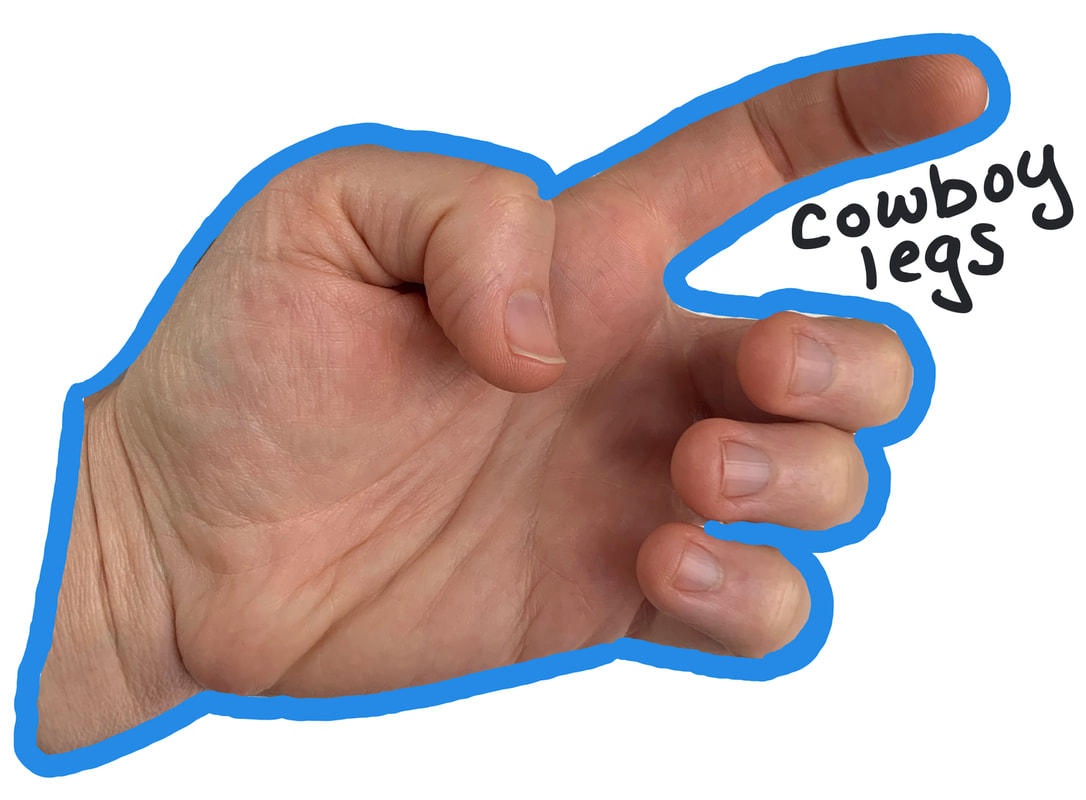
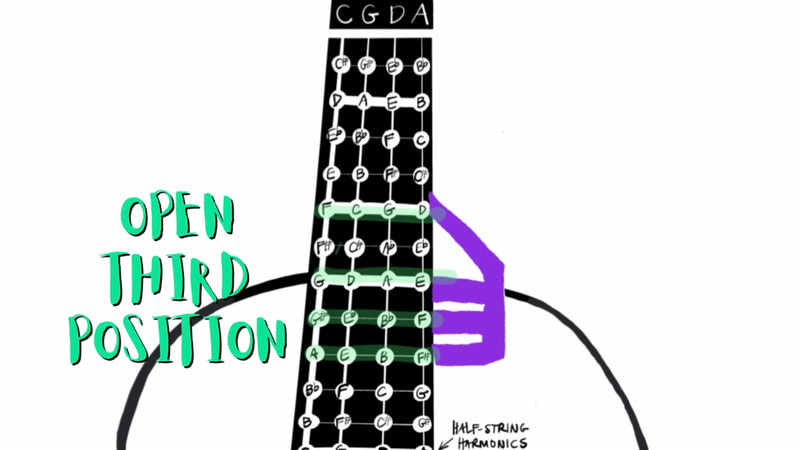
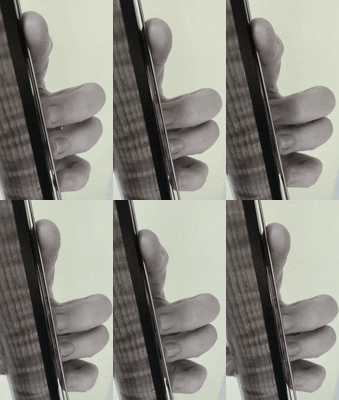
| In addition to using this to extend the reach (pun intended!) of first position, you can use this in every neck position on the cello! The only trick is that as you move higher in pitch, the finger spacings get closer together, so in third and fourth position, my first finger is no longer pointed straight back. Instead it looks like the 1 and 2 are "cowboy legs" - bowed apart like they've been on a horse all day. |
How to Make Open Position
|
|
But I Can't Reach!
| Lots of students have trouble reaching back far enough at first. That's ok! If you let your first finger stay very light on the string, it will sound flatter than if you press a lot. So figure out how little weight you can use on your first finger and still make a decent tone, memorize that feeling, and incorporate that into how you execute your open position. Remember that pressing harder will make things worse! You'll probably need to do lots of exercises to get really good at this. It's weird to not press hard. |
Exercises to Help
In order to make the most out of exploring the world of open position, you need a very good grasp of your fingerboard geography. I recommend filling out this fingerboard chart - it is so educational to compare your big and scary sea of fingerboard to a piano keyboard. They have the same notes and the same rules. Each note is a half step from the ones around it, and notes can have different names without actually changing.
Once you've finished, use the filled-out chart to check yourself.
Once you've finished, use the filled-out chart to check yourself.
| | |
If you need some pieces to play that let you experience these open positions in an organized and controlled setting, check out Position Pieces vol. 1 by Rick Mooney.
If you need more guidance in how to create this hand shape, you should buy The Language of the Left Hand and The Road to Secure Intonation in the Neck Positions for the Cello by Martha Gerschefski.
Want to try your hand at putting your own fingerings in, using all the neck positions in open and closed? Here are two worksheets for you to try:
| | |

 RSS Feed